Codes Libraries
Codes libraries are used to assign classification codes to objects in your models, which will help keep the models more organized and can help in creating automated quantity takeoffs and schedules.

When creating a new project codes library, you can create a new one from scratch, import your own library, or choose from a list of predefined templates or classification systems. These systems are linked to the buildingSMART Data Dictionary to ensure you always have access to the latest updates of the most commonly used systems.

To import your own library, use a .csv of .xls file structured according to the following example:
Code
Name
Parent Code
1
Item 1
1.1
Subitem 1.1
1
1.1.1
Subitem 1.1.1
1.1
1.1.2
Subitem 1.1.2
1.1
1.2
Subitem 1.2
1
1.2.1
Subitem 1.2.1
1.2
1.2.2
Subitem 1.2.2
1.2
1.3
Subitem 1.3
1
2
Item 2
3
Item 3
A template for such a library can be downloaded here:
Codes library template download
Once a codes library is added to the project you can open and view it, or you can start assigning classification codes in your models using the Inspect panel.
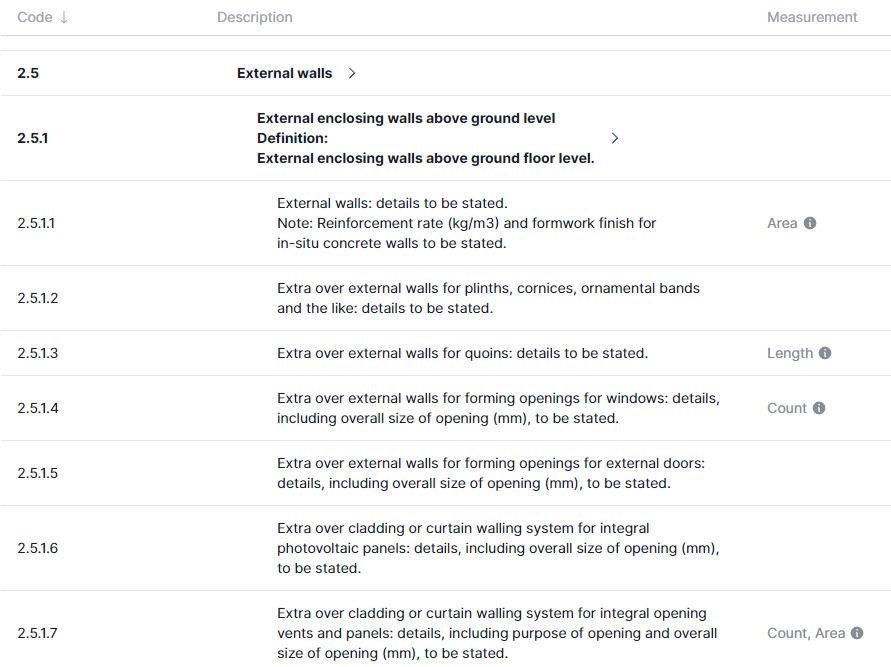
Some classification systems come with predefined measurement definitions that define which quantities will be calculated when generating a quantity take-off. For instance, external walls classified with the code 2.5.1.1 of the NRM system - as shown in the image below - will have their area calculated in a quantity take-off.

Once a codes library is defined it can be edited; existing codes can be modified or removed, and new codes can be added. To edit a code, right-click it or use the action menu on the bottom of your screen after selecting it. You will have the options to:
edit the selected code,
insert a new row on the same level as the selected code,
create a sub level of the selected code,
delete the selected code.
When adding a new code or editing an existing one, you can define the identification code, the name and optionally a measurement definition.
Note: when removing a code that is referenced in one or more models, you are effectively removing data from that model. Do this with caution, as this change is irreversible.
Last updated